become a contributor


MAKE IT CUTE
DIYs
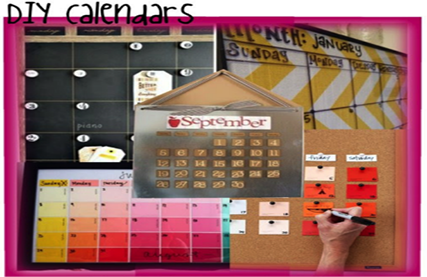
Bring on the new month with a DIY calendar!
[gallery]
 VIEW THUMBNAILS


-

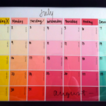
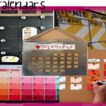
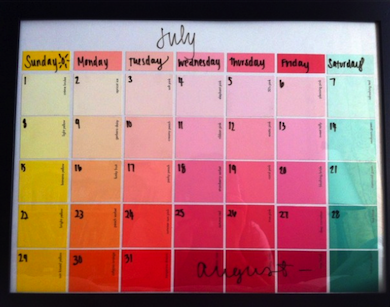
Pretty paint chip by Raining Hot Coupons
Our fave part about any hardware store is the paint section -- filled with all the colors of the rainbow, you can practically get any color you want. And in case you didn’t know, the sample paint chip cards are FREE! Use these cards to brighten up your busy day.
What you'll need:
- Multi colored paint chips (42 different squares)
- 12” x 16” glass frame
- Glue
- Dry erase marker
Directions:
1. Cut paint chips into individual squares if there are multiple chips on one card.2. Lay out your paint chips on the frame.
3. Glue down each square in whatever color pattern you choose (Make sure you have 6 rows of 7 squares).
4. Close the frame and then write over the glass with your marker.
5. Label the top row with the days of the week, and then the bottom rows with the days of the month!
-

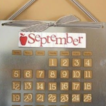
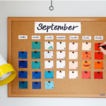
Magnetic Months by The Happy Scraps
This reusable calendar is not only totally fun to play with, but it's also chic enough to hang in your decorated room.What you'll need:
- Magnetic sheet/board (at hardware or craft stores)
- Chipboard, cardboard or cardstock
- Magnets
- Glue gun
- Sharpies/markers
Directions:
- Cut your cardboard or stock into squares.
- Glue the magnets to the back.
- Write the days and numbers of the month on each piece and organize them on your magnet sheet.
-

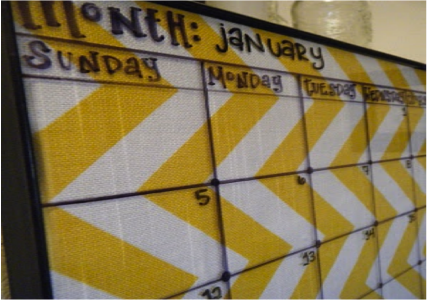
Fabric Frenzy by Mary's Mind Metropolis
This cal brings some serious swag into the zig zags! From your soccer sched to homework assignments, you'll love writing up that to-do list on this totally eye-poppin' design.What you'll need:
- Glass picture frame
- Dry erase marker
- Fabric or paper
Directions:
- Simply choose the material of your choice and cover the base of the frame with it.
- Put the glass over and then write the calendar grid with the dry erase marker.
-

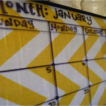
Cork calendar by Say Yes
Ditch the frame and go for the traditional corkboard. Pin your calendar dates and move around your schedule as easy as 1-2-3!What you'll need:
- Corkboard
- Push pins
- Sharpies/markers/pens
- Cardstock, paper, paint chips, etc. (your choice!)
Directions:
- Cut whichever material you decided to use into squares.
- Align the squares on the corkboard in a calendar grid.
- Use pushpins to secure them to the board, and then decorate however you like!
-

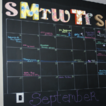
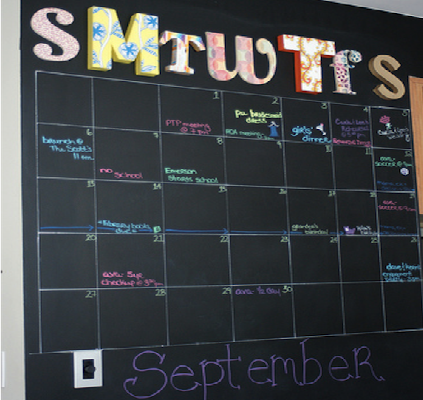
Chalk play by This Adventure Called Life
Planning your sched will never get old! Make this chalkboard cal and doodle away -- talk about fun, cute and colorful.
What you'll need:
- Chalkboard paint
- A board of some sort
- Multi-colored chalk
Directions:
- Pick up chalkboard paint at a local craft store.
- Paint it on the surface you chose.
- Once it dries, use different colored chalk to create your own calendar.
- Get a chalkboard eraser so you can change it each month!
-


POLL
The best Saturdays start with a trip to the bakery. The superior pastry & drink combo is:

LOVE THIS
🌸 QUIZ! Plan your perfect spring picnic 🌸

The flowers? Blooming. Your al fresco hangout? Totally ready to get plotted (inspired by our current read, The Second Favorite Daughter's Club: Sister Sabotage). Click HERE to take the quiz!
FREE STUFF
Win! The Face Shop cleanser

The Face Shop’s triple-threat cleanser softens, brightens and hydrates. Enter to win here!