become a contributor


MAKE IT CUTE
DIYs
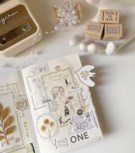
This DIY marble mani is exactly what your nails need

Tired of having nails that are just one boring old color? We have the *perfect* solution for you! It’s called water marbling, and it’s both easy and fun. It might take you a few tries to get the hang of it, but once you do you will be absolutely obsessed. Read on to find out how exactly to get the trendiest tips:
You'll need:
- Towel
- Nail polish remover
- Tape
- Toothpicks
- Nail polish (at least 3 different colors)
- Base coat (Optional)
- Top coat (Optional)
- Cotton swabs
- Scissors
- Small bowl
Directions:
1. This is an optional step but will help your design last longer. If you have a base coat around, now would be the time to apply it to your nails. As you wait for them to dry you can start on the next step.
2. Apply tape to the skin around your nail bed. You’ll want any skin in the immediate vicinity of your nail to be covered up, as you don’t the actual polish to get onto your skin.
3. Put some room temperature water into your bowl. Make sure that the water is close enough to the top that you are able to easily dip your finger into it, but not too high that you will risk overflowing when you submerge your finger. You will then drop a dot of nail polish into the water from about half an inch above the bowl. If this is done right, it should immediately start spreading to form a thin sheen.
4. Drop as many dots of nail polish into the water as you’d like. It is best to not wait too long to start on with the next step (waiting too long will let the nail polish dry against the surface of the water).
5. Now you’re going to want to take your toothpick and start from the outside, pulling the polish into the middle of the bowl. Do this till you get your desired effect.
6. Make sure your finger is completely covered and flip your hand over so that your nail is facing the water.
7. Dip your finger in and keep it in the water while using the toothpick to clean away the excess nail polish.
8. Let the polish dry. When it is dry, you can peel away the tape from your finger. If you did accidentally get some polish onto your finger, don’t worry. Simply take a cotton swab and clean it up with your nail polish remover.
9. This step is also optional. Once your nail polish is completely dry, you can go over it with a clear top coat to help prevent chipping.
10. Repeat these steps for each nail. The options are endless for the possible designs you will be able to create.
Have you ever water-marbled your nails? Let us know how it turned out in the comments!
Photo credit: Instagram.


POLL
Choose the best braided hairstyle:

LOVE THIS
All your period probs, solved 💕

So maybe your monthly flow isn’t, um, go with the flow. Never fear! Take our quiz to pair up with your perfect Pamprin and end the menstrual madness.
FREE STUFF
CALDER ACADEMY IS A TOTAL NIGHTMARE
The scariest school on Earth is about to experience real fear. A hurricane unleashes secret horrors at an academy for rogue paranormals in this gripping spinoff of the bestselling Crave series. Enter to win here!