become a contributor


MAKE IT CUTE
DIYs
Your guide to making bath bombs for the ultimate DIY spa day

Whenever you've gone to the mall, you've probably seen (and smelled) gorgeous bath bombs in the window of every fancy spa store. These fizzing concoctions are irresistible—but also very pricey. Surprisingly, bath bombs are easy to make at home with a few simple and cheap ingredients. Making bath bombs is the perfect craft to do with your besties for the ultimate DIY spa day.
Here's what you'll need:
-1 cup baking soda
-1/2 cup corn starch
-1/2 cup citric acid
-1/2 cup epsom salt
-15 drops essential oil
-1 teaspoon water
-6-12 drops liquid food coloring, as needed
-bath bomb molds, such as these
-a whisk or spoon
-2 bowls
-parchment paper
Step 1

To start, take one of your bowls and pour in the baking soda, citric acid, epsom salt and corn starch. Next, whisk until the mixture is uniform.
Step 2

Now that you have your dry ingredients, take out another bowl and mix together the essential oil droplets, the water and the food coloring. Once your wet ingredients are mixed, begin pouring your wet ingredients into the bowl with your dry ingredients. Be careful to not pour the wet ingredients in all at once. Instead, constantly stir the dry ingredients and *slowly* pour in the wet ingredients. This way, the bath bombs won't fizz before they are even made. Continue stirring until you have a consistent mixture. Feel the mixture with your hands. It should be mostly dry but somewhat moldable. You can add more water if the mixture is too powdery.
Step 3

Now for the fun part! Mold your bath bombs by filling each half of the mold and packing it down tightly. Next, twist the halves together firmly. Squeeze the bath bomb for a few seconds, then carefully remove the mold and place the bath bomb on the parchment paper. This step takes some trial and error, so make sure to be patient. Once all of your bath bombs are on the parchment paper, let them dry for 24 hours. You now have your very own bath bombs!
Follow us on IG @girlslifemag for more DIY ideas!
Images by Delilah Brumer.
POSTED IN MAKE IT CUTE, DIYs


POLL
Imagine there was a rom-com bestseller about you and your crush. Which trope would be front and center?

LOVE THIS
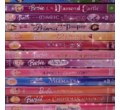
📚🌸Fill your shelves with these spectacular spring reads 🌸📚
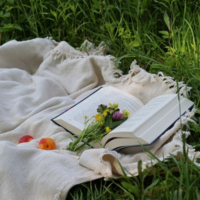
Your perfect picnic plus-one? A radiant read, ofc. Enter to win them all here!
FREE STUFF
A ROAD TRIP TO REMEMBER

Ride along as three women narrate a perilous wagon journey westward during the Black homesteader movement. Their travels may set them free—or cost them everything they have. Enter to win here!