become a contributor


MAKE IT CUTE
DIYs
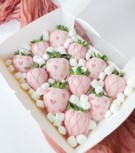
GL CRAFTS: Not your Paas Eggs

It’s that time of year again when stores are overwhelmed with pastel baskets, chocolate bunnies and – EASTER EGG KITS! As I’ve grown up, it’s amazing to see how many different egg decorating kits are available each year to dress up your hardboiled eggs. I’m not exactly sure what coloring eggs has to do with Easter, but nevertheless, you have to admit it’s fun!
With all of the options that these kits have to offer – tie-dye, glitter, swirls, neon, etc. – the things you can do are endless. But when I was young, we didn’t get all those fancy-schmancy egg decorating kits and we still managed to make some cool looking eggs! If you don’t have any cool kits on hand, or if you just want to be a little more original with your decorations, try out some of these tricks! I bet you’ll have the most unique looking eggs in town.
Food Coloring
Who needs Paas when you got food coloring!? With all those special kits, you’re somewhat limited to colors. Sure, you could double dip your egg to create a few different colors, but sometimes you end up with those weird splotches, or you accidentally overdo it and end up with an ugly brown egg… EW! With food coloring, the sky is your limit! Tap into those art classes you’ve been taking and you can mix colors to create a gazillion different colors.
Here’s what you do:
Boil some water and pour 1/2 cup into each cup or container you’ll be using. (Use something small enough so the water covers the entire egg when you put it in, but big enough that it doesn’t overflow. And don’t use anything that might get ruined if it stains! Coffee mugs work well.) Add 1 teaspoon of vinegar and drops (a total of 20 is usually good) of desired food coloring to each cup. Dip your hardboiled eggs in the water for about 5 minutes, and then remove the eggs (carefully!) to a wire rack with wax paper underneath (or even the empty egg carton) to cool.
Color Chart:
The color possibilities are endless, but here are a few food coloring combinations to get you started, courtesy of McCormick®. (Don’t forget to play around and let us know what awesome color combinations you come up with!)
Green Apple: 25 Green, 2 Blue
Turquoise: 10 Blue, 3 Green
Lime: 24 Yellow, 4 Green
Purple: 15 Blue, 5 Red
Cantaloupe: 24 Yellow, 2 Red
Jade: 17 Green, 3 Blue
Plum: 10 Red, 4 Blue
Raspberry: 14 Red, 6 Blue
Watermelon: 25 Red, 2 Blue
Teal: 15 Green, 5 Blue
Fuchsia: 18 Red, 2 Blue
Spearmint: 12 Green, 6 Yellow, 2 Blue
Maize: 24 Yellow, 1 Red
Grape: 17 Blue, 4 Red
Orange Sunset: 17 Yellow, 3 Red
Jungle Green: 14 Green, 6 Yellow
Remember! The longer your egg stays in the dye, the darker it will get. If you want a lighter shade of the color, try pulling your egg out sooner. If you want it darker, try leaving it in a little longer. You can also double the amount of food coloring drops to create a deeper hue.
Puffy Paint
When I was little, my sister and I used to make sock puppets with puffy paint (also called dimensional fabric paint), so why couldn’t you do the same thing with eggs!? Make a little character using the puffy paint (which you can get at your local craft store). Or use the glittery puffy paints to add a little glitter that won’t end up all over your hands when it’s time to eat your eggs (gross!). You can easily make your egg look as fancy as a Fabergé with just a few squiggles of puffy paint!
Crayons
Don’t underestimate the power of crayons! You can use them to draw designs before or after dyeing your eggs. Use a white or clear crayon before you dip and the dye won’t stick to that area and it’ll show through the dye. Or draw cute designs with colored crayons after your dyed egg dries.
Tip: Try doing some two-toned eggs by holding each half in a different color. I like to do green on the bottom and light blue on the top, and then I use crayons to draw a sun in the blue half to make a sky and flowers in the green half to make it look like grass! Get creative!
-Jessie Merryman


POLL
If you owned your own makeup brand, which product would you create first?

LOVE THIS
📚🌸Fill your shelves with these spectacular spring reads 🌸📚
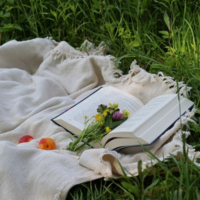
Your perfect picnic plus-one? A radiant read, ofc. Enter to win them all here!
FREE STUFF
Win! TBH Kids moisturizer
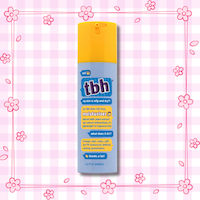
Boost your skin’s natural barrier with TBH Kids moisturizer. Enter to win here!