become a contributor


MAKE IT CUTE
Fashion
DIY statement earrings for the budget fashionista

 VIEW THUMBNAILS


-
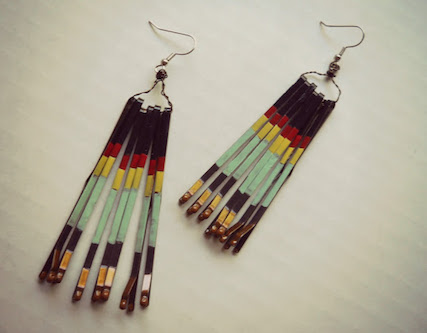
 DIY Bobby Pin Earrings
Remember all those bobby pins you’ve found after cleaning your room? Here’s the best way to put them to good use. This is a fun and budget friendly activity where the only difficultly will be picking a funky design for your earrings.
You’ll need:
- craft wire
- earring hooks
- bobby pins
- nail polish
- tape
What you’ll do:
Step 1: If your bobby pins are new keep them on the piece of cardboard they came on. If you’re upcycling a few old pins, just slide them onto an index card to get them in place while you paint.
Step 2: Using your tape, section off the areas you want to paint, grab your nail polish and get started! We’d suggest working with 5-7 bobby pins per earring to create your pattern.
Step 3: Once the nail polish has dried and you have carefully peeled back the tape, it’s time to transform your bobby pins into earrings. Cut two pieces of wire and twist them around each other and slide your bobby pins off the cardboard and onto the wire.
Step 4: Loop this wire through the opening of the earring hooks and then wrap the wire a final time around itself to secure it all in place.
Step 5: Repeat steps 3 and 4 to create your other earring. And voila! You’ve got your own DIY bobby earrings.
Image and DIY courtesy of: themetricchild.blogspot.com
-
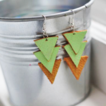
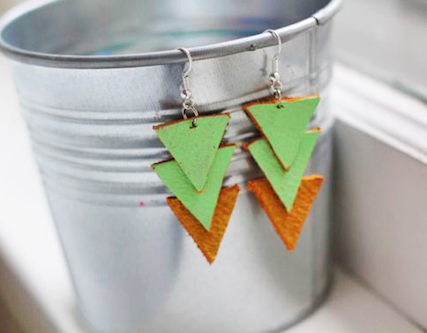
 DIY Leather Triangle Earrings
It’s time to brush up on your geometry with this triangular DIY. These rocking equilateral triangles won’t be hard to make and the materials aren’t hard to find. Just go to your favorite craft store, pick out your leather and start designing.
You’ll need:
- scrap leather (available at any craft store)
- craft paint
- glue
- exacto knife
- glue
- earring hooks or posts
- jump rings (optional)
What you’ll do:
Step 1: Taking your piece of scrap leather, measure 1 inch triangles. You get to decide whether you want your earrings to have one, two, three or more triangles each.
Step 2: Cut out your triangles with an exacto knife (you probably want to do this step on some cardboard, just so the exacto knife doesn’t damage the surface you’re working on).
Step 3: Paint the leather in whatever color you like. Allow time for it to dry and them add another coat.
Step 4: Once the paint is dried, use your glue to attach the leather triangles together. Be sure to follow the directions listed on the glue you’re using.
Step 5: Finally, glue your painted leather triangles to an earring post. If you’re using earring hooks instead, simply poke a small hole at the top and attach the hooks using pliers and a jump ring.
Image and DIY courtesy of: hellonatural.co
-
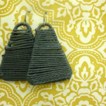
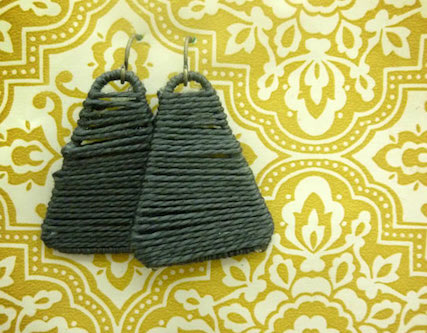
 DIY Paperclips and String Earrings
Not only can paperclips clip your papers together, but they can also bring your DIY stylish earrings to life. Make your own designer earrings with just paperclips and cotton thread!
What you’ll need:
- paper clips
- string or embroidery thread
- pliers (optional)
- earring hooks
- glue
What you’ll do:
Step 1: First, you need to bend the paper clips into a triangular shape. To do this, unbend all three curves within the paper clips (you can use pliers to do this if it’s too difficult to unbend with your hands).
Step 2: Grab your glue and attach the two ends of the paper clip together, so there’s no openings in the triangular shape you just created.
Step 3: Next, take your string and wind it around the wire. To keep it secure, add a dab of glue to the wire before you wrap the string around it.
Step 4: Once the entirety of the paper clip is wrapped in string, use more string and glue to create a pattern within the triangle. You can simply wrap the triangle like the picture above, or opt for a more abstract pattern instead.
Step 5: Finally, attach the paper clip triangles to earring hooks. Just open the loop at the bottom of the hook using a pair of pliers, slide your triangle onto this loop and close it.
Image and DIY courtesy of: evie-s.com
-
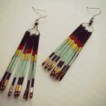
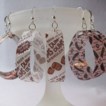
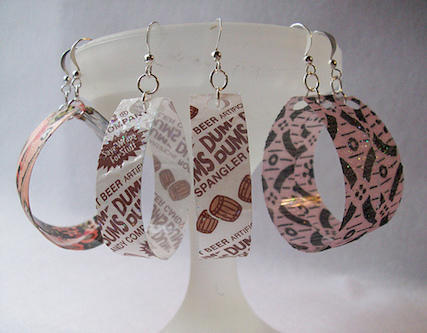
 Recycled Bottle Earrings
These perfect earrings are produced from recyclable material. Very eco-friendly and a savior to your budget. Pick out your own fabric, pick up your favorite two liter bottled beverage, and start creating your own stylish hoops!
What you’ll need:
- a 2-liter clear plastic bottle (clean and dried)
- mod podge
- a paintbrush
- hole punch
- scissors
- ruler
- marker (we’d suggest using a sharpie)
- thin fabric, candy wrappers, etc
- jump rings
- earring hooks
What you’ll do:
Step 1: Using your scissors, cut the top and bottom off of the clear plastic bottle. Then, cut down the middle. What you have now is a rectangular piece of plastic that you’ll be using to create your earrings.
Step 2: With this rectangular piece of plastic, measure and cut two 1/2” by 5” strips.
Step 3: Now, it’s time to personalize these earrings. To decorate using fabric, cut the fabric slightly larger than the strips of plastic. Mod Podge the fabric into place on the plastic and follow up with another layer once the first coat is dried. You can use this same technique if you’d like to decorate your earrings with candy wrappers.
Step 4: Once the Mod Podge is completely dried, use your hole punch to create a hole on both ends of the strips.
Step 5: To attach the strips to the earring hooks, loop each end through a jump ring (just twist it open with pliers). This should transform the strip from a strip to a hoop. Then, using another jump ring, attach this hoop to an earring hook. Be sure to close each jump ring tightly so the hook or strings don’t slip out.
Image and DIY courtesy of: steppingthrucrazy.com

POSTED IN Fashion, summer, accessories, crafts, diy, accessory, accessory