become a contributor


MAKE IT CUTE
Room
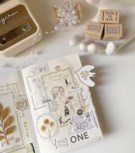
Ready for a room revamp? Try this fab wall stenciling DIY

Sure, you might have tons of posters and hanging wall decor, but what about paint designs? Wall stenciling can be glamorous and easy at the same time. And the creating it is the most fun part. Follow the steps below to create this super chic stenciling DIY.
You'll need:
- One stencil
- Paint (Be bold with your color selection. You can even mix and match colors if you want.)
- One roll of masking tape to tape down the stencil and also to protect trim around walls
- A paintbrush
- Paper towels
- A tarp to protect the floor
- An outfit you don’t mind getting dirty! (Or just use a smock)
Directions:
1. Find the perfect space for the design. Make sure you find that section of the wall that you think needs sprucing. Is it above your bed? By your bookshelf? Wherever it is, make sure you love it.
2. Mark the starting point of the stencil and tape the stencil to the wall, then cover all sides and edges of the stencil with tape (preferably masking tape.) Make sure it’s completely sealed to the wall. You definitely don’t want the stencil to move while you’re in the middle of painting.
3. You’re going to want to use the dry brush method. This way, the paint comes out thick and bold, as opposed to light and watered-down.
4. Once you’re finished painting over the stencil in one spot, untape the stencil and retape it in the next location. Mark the stencil starting points again.
5. Repeat the process until you’ve created the look you’re going for! It’s that simple.
Have you ever done a stencil on your wall? Let us know below!
Photo credit: Pinterest.


POLL
Choose the best braided hairstyle:

LOVE THIS
Take our GL survey to win the ultimate prize! 🌟

We want to hear from our readers about friends, crushes, school life and so much more—and to show how much we appreciate your input, we're giving away an adorbs curling iron from CHI (worth over $100!). Click HERE to take the survey and enter to win!
FREE STUFF
MARRIAGE, MATCHMAKING AND MIX-UPS
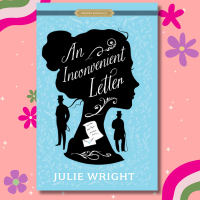
Imagine having your secret love letters discovered by the wrong person—talk about a swoon-worthy slip-up! Pride and Prejudice fans will heart this will-they-won’t-they romance set in the lovely London countryside. Enter to win here!