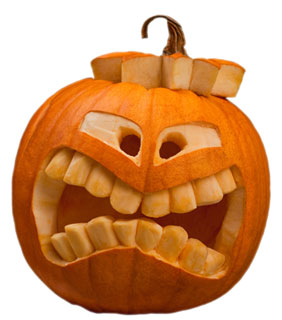
Jack-O'-Lantern Jamboree

Way Back When
People have been carving gourds for centuries, but it wasn’t until Western European immigrants came to the U.S. and discovered our fabulous native pumpkins that the jack-o-lantern began to resemble what we carve today. As for the name, well, that’s all legend. You can read about Stingy Jack and his deal with the Devil on History.com.
Traditionally, the Irish, Scottish and English placed the carved lanterns in their windows or by their doors to frighten away lurking spirits. Nowadays, these festive fruits serve as beacons to masked munchkins and costumed kids on the spookiest day of the year.
Getting Ready
If you’ve got the time, you and your buds can take a fieldtrip to a local pumpkin patch or gardening store and pick your own pumpkins. Can’t squeeze it in? No sweat, just head out in advance and snag one for every gal in your group.
On the day of your party, take the action outdoors if possible to soak up the sun’s last warm rays. Cover picnic tables with newspaper and set up a carving station for each girl complete with spoons, awls, hand saws and whatever other instruments you’ll need. Have an adult cut off the tops of the pumpkins and begin hollowing ‘em out for you.
I’m a big fan of the carving kits, I have to say. You can pick them up at any grocery, drug or garden store during this time of year. They come complete with fabulous designs and not-too-sharp carving instruments.
Party Time
When your gang has arrived, get busy drawing your designs on printer paper. Before you get messy, though, be sure to stow ‘em away. That’s right, you’ve gotta clean out your pumpkins, first! Toss the goop—or toast the seeds with a pinch of salt for a snack—and scrape the insides until the skin is thin enough for you to reasonably cut through with a knife or a tiny handsaw—think around ½-inch thick.
Wipe off the outside of your pumpkins using damp paper towels, then tape on your designs. Using awls, poke holes following the lines you drew or the pattern you purchased. This will leave a good grid for when you’re ready to cut.
Once your pattern is poked onto your pumpkin, grab your handsaw and go to town, but do it slowly. Take your time, chat it up and work with caution. It’s hard to fix a pumpkin after you’ve messed it up (and gossip makes everything more fun, right?).
Light ‘Em Up and Show ‘Em Off
Finished? Fab! Grab some votive candles, place one in the bottom of each pumpkin and light the wick. Step back and enjoy. Doesn’t it feel oh-so-much like Halloween now?
POSTED IN halloween

 become a contributor


