become a contributor


MAKE IT CUTE
DIYs
5 steps to carving the perfect pumpkin

Carving jack-o-lanterns is an age old tradition that brings friends and family together for a little healthy competition. If you’re a first-time carver, or you’re in need of some fresh info, we’ve got some tips to turn you into a punpkin pro.
Pick your pumpkin.
Whether you’re going to pick a pumpkin from the patch or from your local grocery store, finding the perfect one is crucial. Make sure you’ve got a nice large surface area, so you have room for your creation.
Get the right tools.
Using your dull kitchen knives may not be the safest idea when it comes to pumpkin carving. Tons of stores sell little kits with the proper tools to make the process a lot easier.
Properly prep the pumpkin.
Before you just go in and start carving away, you have to gut and clean the inside and outside. Cut open the top of your pumpkin and make sure you get all the goop and seed out. Then be sure to wipe it down so everything is smooth and clean.
Try stenciling.
Especially if you’re a newbie, there’s no shame in using a printout. Once you’ve found one you like, print and tape it to the area of the pumpkin you want to be the front. Use a pumpkin scorer or the point of one of your tools and outline the pattern. One you take off the paper, you will be able to see where you need to cut.
Make it last.
First, don't carve your pumpkin too early (they usually don’t last past two weeks). You can use white vinegar, WD-40 spray or Vaseline to spread on your pumpkin to keep it from rotting quickly. Try one tbsp of bleach and a qt of water in a spray bottle to spray daily on your carving. This will help kill the bacteria on your pumpkin to help it last longer, too.
Did you know any of these helpful tips? Tell us in the comments below!
POSTED IN halloween, crafts, diy, fall fun, pick the perfect pumpkin
check these out!


POLL
May the fourth be with you! Which Star Wars heroine in your forever fave?

LOVE THIS
Take our GL survey to win the ultimate prize! 🌟

We want to hear from our readers about friends, crushes, school life and so much more—and to show how much we appreciate your input, we're giving away an adorbs curling iron from CHI (worth over $100!). Click HERE to take the survey and enter to win!
FREE STUFF
Win! Barbie-inspired Azazie prom dress
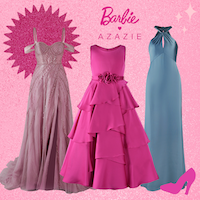
Bring Barbie's iconic fashion sense into the real world—with an Azazie prom dress from their limited-edition collection (up to $400 in value!). Step one: Score your dream fit. Step two: Turn heads allll night long. Enter to win here!